After I learned how to create site specific WordPress plugin, I created many plugins for my site with functions ranging from changing the logo to a custom SVG logo, adding a randomized tagline, to hosting Google fonts locally and much more.
Now, I thought it was the right time to learn how to create something else for a platform that I use daily and that platform is my browser, Google Chrome.
Today, I will teach you how to create Google Chrome extension.
I’m sure everyone reading this article with Google Chrome has at least one extension installed. It’s no secret that extensions are useful to users who want to block ads, enhance Reddit browsing experience, analyze a website’s security header or check what fonts sites are using.
With a library that contains 50,870 extensions, there’s something for everyone. And today, it’s your turn to learn the basics of creating a Google Chrome extension.
# How to create Google Chrome extension
It’s really easy to create a Google Chrome extension, you just have to be familiar with three coding languages, HTML, CSS, and JavaScript. With that being said, you should be good to go.
Today, we will learn how to create Google Chrome extension that adds a button next to the Omnibox. When you click it, a gif will appear and a sound will start playing automatically.
This is a simple extension and it contains HTML, JS, gif, and audio. It shows you that you can do pretty much anything you want with a Google Chrome extension.
As long as you follow the rules.
# Step 1:
Create a set of files and folders that look something like this:
FirstGoogleChromeextension manifest.json popup.html Assets img icon.png icon16.png icon48.png icon128.png gif cool.gif audio cool.ogg JS popup.js# Step 2:
You need to fill the manifest.JSON with a set of meta information to identify your extension. From things like:
- name
- description
- version
- manifest version
To information about what the extension is going to do and what permissions it has.
{ "manifest_version": 2, "name": "CCE", "description": "Cool Google Chrome extension.", "version": "1.0", "browser_action": { "default_icon": "assets/img/icon.png", "default_title": "Click Me", "default_popup": "popup.html" }, "icons": { "16": "assets/img/icon16.png", "48": "assets/img/icon48.png", "128": "assets/img/icon128.png" }, "permissions": ["activeTab"]}Now, let’s explain those few lines from above that are not obvious:
-
browser_action: It’s used to put icons to the extension button next to the Omnibox and browser action which can be a tooltip, a badge, and a popup -
default_icon: set the icon of the browser_action. -
default_title: The title which will appear when you hover over the icon. -
default_popup: A popup appears when the user clicks the icon, and it contains any HTML contents that you like. -
icons: A set of icons that are used throughout the extension. - 16: icon 16*16 is used as the favicon for an extension’s pages.
- 48: icon 48*48 is used in the extensions management page. 1
- 128: icon 128*128 is used during installation and by the Chrome Web Store.
# Step 3:
We are done with the manifest.JSON file, now we move on to the other files in the other folders.
- In our
popup.htmlwe will put the following:
<!doctype html><html> <head> <title>Cool Google Chrome extension!</title> <script type="text/javascript" src="assets/js/popup.js"></script> </head> <body> <a href="https://www.news47ell.com"><h1>News47ell</h1></a> <img src="assets/gif/cool.gif" width="800" height="420" alt="R A" style="width: 247px; height: 148px;" /> </body></html> This is a basic HTML file with a title, a script in an external file, a link to my website and a gif with the name cool.gif.
- In
line 5we are calling our JavaScript external filepopup.jswhich contain the following code:
const audio = new Audio('assets/audio/cool.ogg')audio.play() This code will so obviously locate the audio file cool.ogg and play it.
# Step 4:
Let’s say now that all your files are ready inside the folder and you want to test your extension.
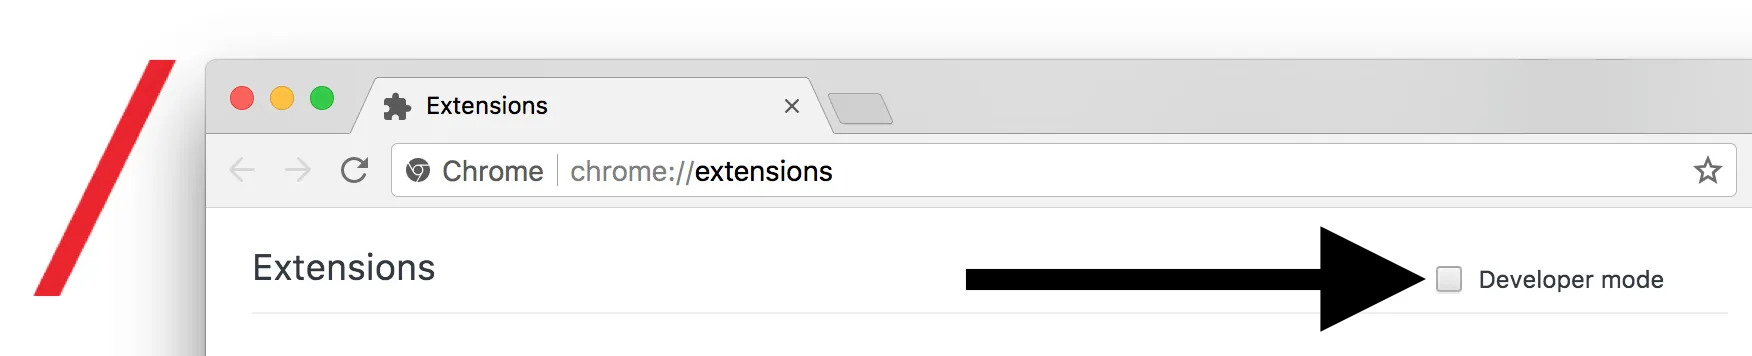
All you have to do is: Open Google Chrome > Click on the menu > More Tools > Extensions.
Now, click the Developer’s mode option.
Then click on Load unpacked extension.
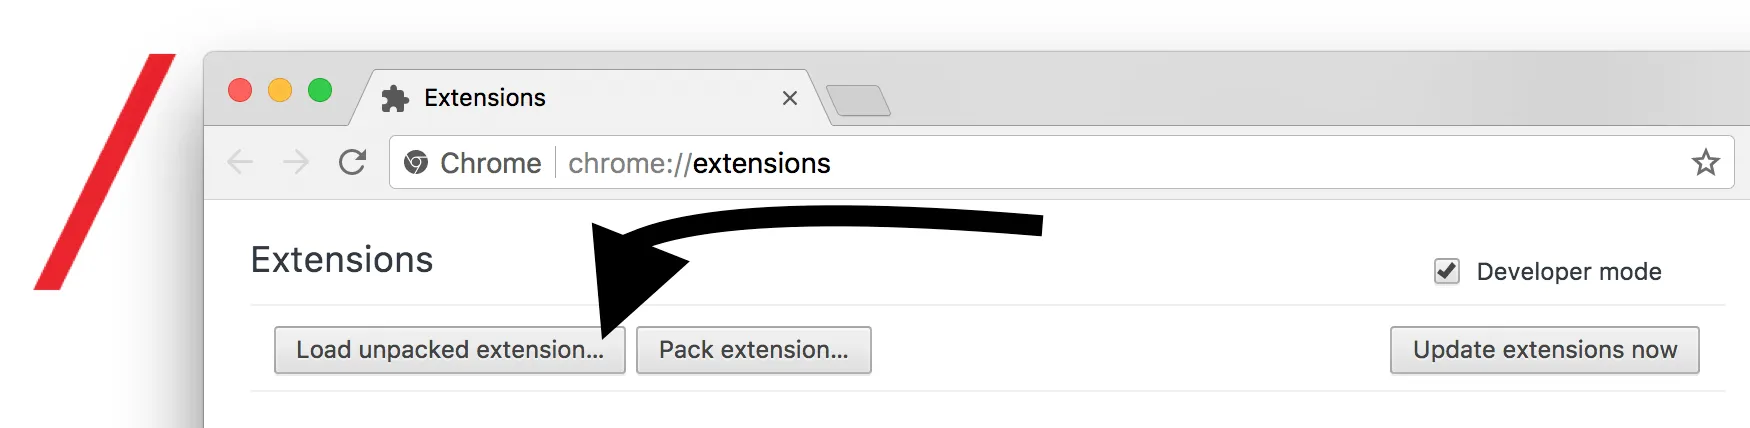
Locate the extension folder, click open, and your extension should load and you’ll be able to test it out.
Tap on the new icon which will appear next to the Omnibox and the audio you used should start playing along with the gif.
# Step 5:
Now that you tested your extension and everything seems to be running smoothly, you need to pack it into a .crx file which is the Google Chrome extension’s file extension.
In order to do that, reopen the extension tab by doing the following: Open Google Chrome > Click on the menu > More Tools > Extensions.
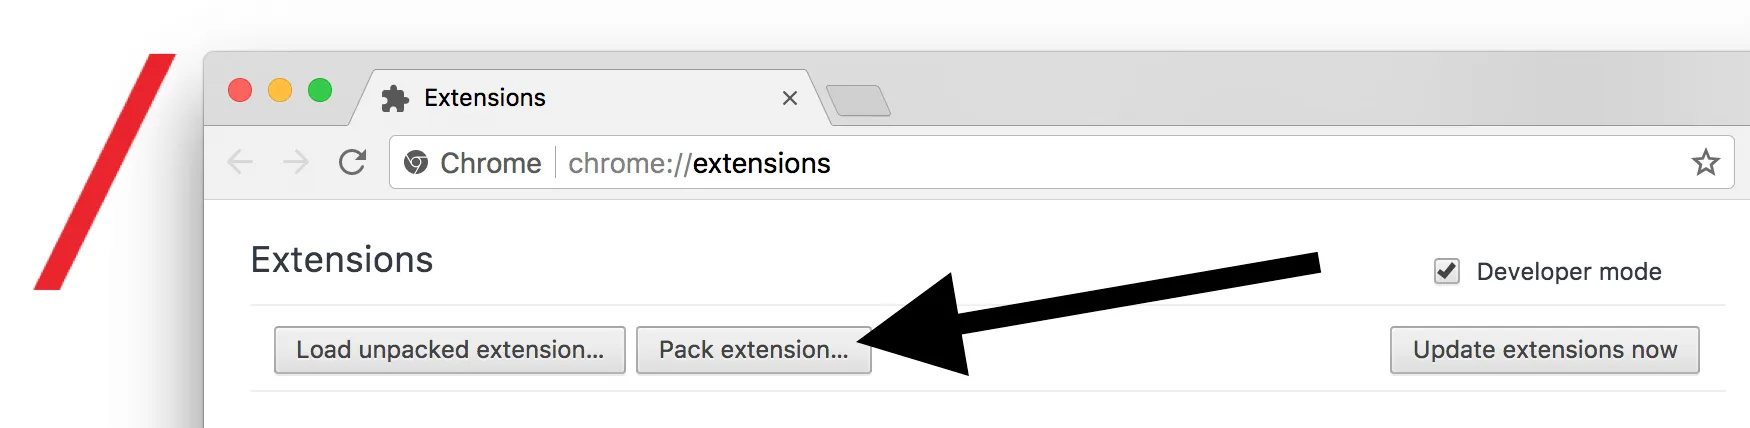
Then click on Pack extension
And in extension root directory browse and select your extension folder.
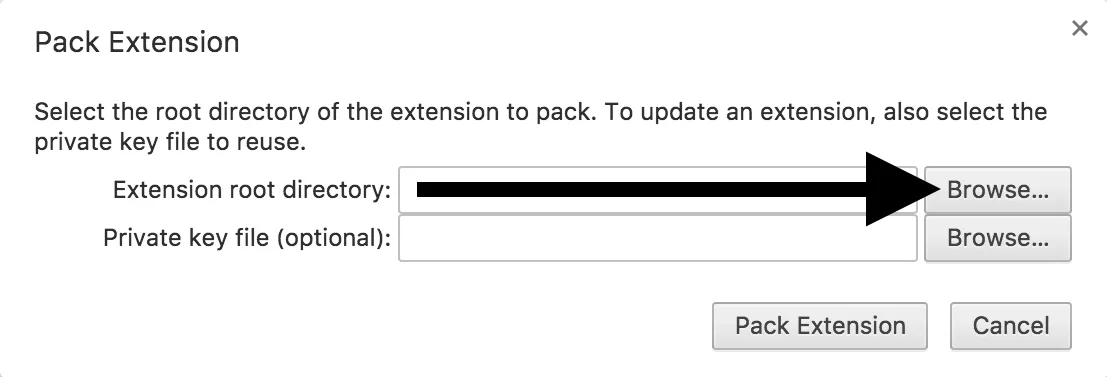
Pack it, you will get a .crx file and .key file which you need to keep in a safe place to create new versions of your extension.

# Conclusion:
As you can see, it’s not hard at all to create a Google Chrome extension. You don’t even need any additional app installed on your computer. Google Chrome and a text editor will do the job perfectly.
And all that is left is to release your imagination and let your fingers type the code that will be a part of the next big Google Chrome extension.
# Footnotes
-
(Chrome://extensions) ↩